How to: A paperless kitchen is not a far off idea
July 20, 2015
I like to consider myself pretty eco friendly. I’m always yelling at my roommate to recycle, I’m going through a costly transition to all cruelty-free cosmetics (don’t make fun) and I’m even trying to grow my own veggies this year. But one of the biggest projects I want to tackle is converting my kitchen to completely paperless. That’s right — I’m done with paper towels, napkins and those large tubs of disinfecting wipes.
My grandmother would laugh at me right now. Paper towels? What a waste!
In reality, it’s not a stretch to strive for a paperless kitchen. How quickly we forget that the whole eco friendly call to action is a recent phenomenon because our grandparents (and their grandparents) didn’t have an abundance of paper products like we do today. If anything, that realization makes me more determined to knock out the wasteful cleaning supplies.
Plan
This transition is not an easy for everyone and it’s actually best done over a period of time. When making a change of this size, you need to allow yourself time to adjust and prepare. The best thing you can do is set a timeline highlighting small goals.
Maybe in two weeks’ time you want to stock up at least 20 cloth napkins. In another week, dish and hand towels. One more week and you can decide on storage that works for you.
Plan ahead and set goals – if you try to achieve a complete transition in a weekend, it will be a hard adjustment for you and those around you. Make it a learning experience and take the time to find the best solutions for your specific needs.
Stock up
First, work to gather all your supplies. Start to build up your new towels and napkins while you’re still working your way through your surviving paper products — don’t wait for them to run out.
If you check out our adjoining Pinterest board you’ll find lots of easy ways to create your own linens, whether its napkins, dish or hand towels. If you’re planning to go the DIY route, the consensus seems to be that diaper cloth or birdseye cloth is the best fabric for making your own kitchen towels. This fabric is absorbent and textured, perfect for cleaning up spills and stuck on food. The fabric is pretty inexpensive both in craft stores and online. And it’s super easy for anyone to do – simply cut, hem the sides and voila! Towels!
But what about your favorite dish sponge? Skoy cloths come in for the save. These cool biodegradable towels are designed to replace 15 rolls of paper towel each! They’re super absorbent and long lasting, perfect for washing dishes. They also dry quickly, fighting bacteria build up.
Storage
Once you have figured out your paper replacements, it is time to think about storage. You want to keep your towels close by and easy to access. You also want to keep towels separated and organized by use. Claim different spots for napkins, hand or dish towels and rags to make the transition easier on your family.
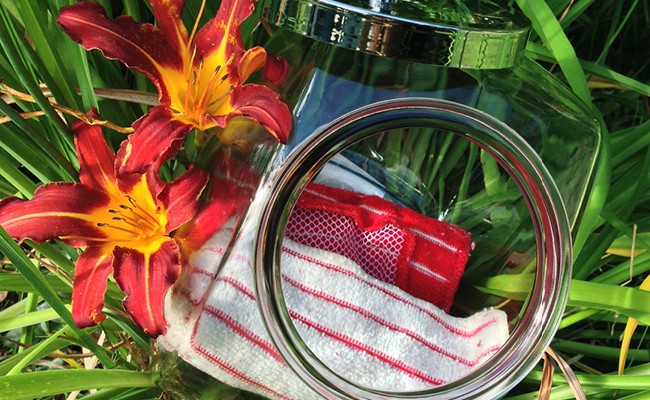
 Keep napkins on your kitchen counter or table in a basket or glass jar. Large candy jars work perfectly for this. The glass containers keep cloths accessible, covered and they create a unique display that adds character to any décor.
For hand towels, hang them over your dishwasher or stove handle – or add an Over the Cabinet Towel Rack. These racks are perfect if you’re still deciding where to stash your new hand towels, because you can move it from cabinet to cabinet. This hanger is designed to slide over cabinet doors and features padding to protect wood from scratches or wear marks.
Rags should be kept accessible too, but you don’t need to keep them out and about. You can keep them tucked in a drawer or under your kitchen sink, but the best idea I’ve found is a unique one. Utilize a Mounted Plastic Bag Recycler to keep rags easy to grab. This bin can be mounted to the inside of a kitchen cabinet door. Simply pile in your rags and pull them out one by one when needed – compare it to the way those handy sanitizing wipes pop out of the container.
Clean up
One of the biggest hesitations that people have when considering a paperless kitchen is the clean-up. It is common to assume that using linens for everything means more laundry, but it’s not the case. If you create an ample supply and utilize a convenient deposit bin for soiled towels, it’s easy – just throw them in the wash with the rest of the towels you’re already washing every week.
 Add a small hamper to your pantry or under the kitchen sink to make it easy to switch hand and dish towels every day. The Door knob Hamper is a great addition. Add this small hamper to a pantry or closet door and keep dirty towels tucked away. The hanging design makes it easy to allow towels to dry before combining too, which helps fight mildew and bacteria build up.
Sharing
It may seem like a small detail, but it is important to ensure your entire household is in the loop. Talk to them, discuss ideas, see what they’re willing to give up and what they’re not – and compromise if you need to. Again, this is a transition not an instant change and it may take longer for some to get with it than others.
Take your time, plan the details and soon you’ll be enjoying the ease of a paperless kitchen.
Find these products and more at OrganizeIt.com.
Find related crafts, products and DIY projects at Pinterest.com/OrganizeIt.
Trending: Chalk it up
July 13, 2015
The trend of using chalkboard paint in the home shows no signs of slowing down in 2015. In fact, trends show it’s going to boom again – but in a different way. Avid Pinterest-ers and bloggers are discovering that you can make your own chalk board paint – wait for it – in any color! While we feature many ways to do this yourself on our Pinterest board, we thought we’d also highlight some of the cool chalkboard themed home goods we offer – some obviously handy and others uniquely decorative.
Write on it
 Chalkboard Wall Organizer: Let’s start with the universal pieces. This organizer is perfect for any entryway. Hang keys, sort mail, post up notes on the magnetic strips, plan your week on the chalkboard and more. This simple piece keeps your thoughts in one place and makes it super simple to share schedules with the entire family. The design features three front hooks and three back storage compartments. This cool piece comes with two magnets and all hardware is included so installation is quick and painless.
- Chalkboard Travel Coffee Mug: This eco-friendly cup offers limitless uses. Perk yourself up with a daily affirmation, write down your name when using the cup for a refill at your favorite coffee spot, or just jot down last minute notes for your morning commute. This whimsical piece comes with an included chalk pencil for easy writing. All pieces are dishwasher and microwave safe.

- Chalkboard Globe: Yup. You read that correctly. Create your own unique view of the world with this clever décor piece. Perfect for a home office or the kid’s room, this writable surface allows you to cover every inch of the Earth with your imagination. Kids can study geography, plan trips and create mythical planets for their own enjoyment. This piece definitely inspires those right side of the brain thinkers.
- Chalkboard Rug: If imitation is the highest form of flattery, then this rug is sure to compliment any living space. Designed to look like a blackboard in a local café, this kitchen mat is designed to add character and comfort. If you enjoy the look of chalkboards but not the cleanup, this rug is the perfect accent piece for your décor. Made with a slip-proof polypropylene backing and a color-fast polyester front this rug is long lasting and easy to clean – you can even throw it in the washer.


DIY
For those of you more interested in creating this trend on our own, you can find a bunch of tutorials on our Pinterest page.
- Chalkboard paint: Create your own colorful chalkboard paint by adding one part hot water, one part plaster of paris and two parts flat latext paint in your choice of color. Combine the hot water and plaster, mixing well then stir in the paint until well combined. Larger items may require multiple coats.
- Indoor/outdoor chalk: You can even make your own chalk with nothing more than water, plaster of paris and tempra paint. Supplies include: toilet paper or paper towel cardboard tubes, scissors, duct tape, disposable plastic containers for mixing, a large mixing spoon, a plastic spatula and a cooling rack. Mix the plaster of paris as directed while separately mixing tempera paint and water. Slowly combine the two mixtures and fill lined cardboard tubes.
Find more crafts and unique products on our at Pinterest.com/OrganizeIt.
Find these products and more at Organizeit.com.
How-to: Pet toy organization and storage
July 6, 2015
We love our fury friends, but we do not love the mess that comes with them. We may have little control over their messy eating habits, sloppy kisses and whirlwind hair shedding abilities, but we can take control over the clutter of their toys.
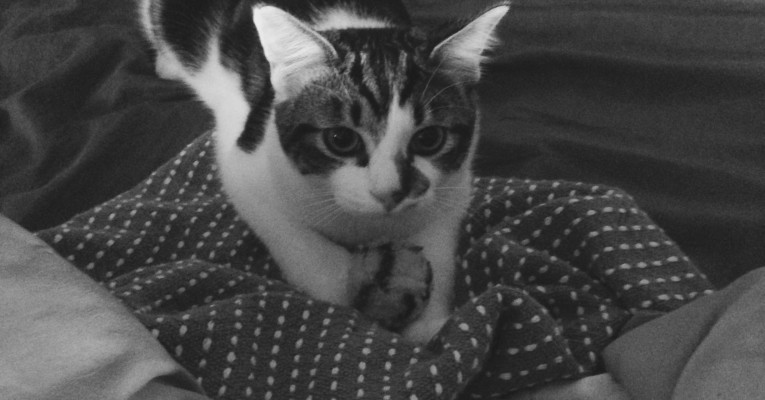
If you’re anything like me, you love to spoil your four legged buddy. My main man, Pablo, has all the toys, cat nip and scratching posts a kitty could dream of – and I’m the lucky one who trips over all of it day and night.
Regardless of whether your best friend is canine, feline or anything else – pet toy storage and organization is an easy task to tackle if you follow these basic steps:
Clean up
The first thing you’ll need to do is gather all of your bud’s toys from around the house. Once you do this, you can sort through them and decide what to keep and what to toss. To make the decision easier, look for the following and get rid of anything that falls under the category:
- Broken: if it doesn’t do what’s supposed to do anymore, trash it. Pet toys that are broken pose a greater risk of choking or swallowing for rough players.
- Old and/or dirty: If it’s been chewed down to the bare bones, dragged through the dirt or simply over played with, get rid of it. These toys are a breeding ground for germs and mold.
- Unfavorable: Have a toy that you friend seems to show no interest in? Donate it to your local shelter and help out a pup in need.
- Wash: When Pablo was a kitten I gave him a teddy bear. That thing has become his best friend. I can’t tell you how many times I have sewn it up just to watch him unleash his inner pint-sized lion on it. Those favorite toys are hard to get rid of, but they can be cleaned properly. Plush toys can be soaked, hand washed or thrown in the washing machine. You can even wet them and place them in the microwave to steam away any germs. Hard toys, like chews, can be soaked or placed in the top rack of the dishwasher to sanitize.
Storage
Once you have sorted through toys, it’s time to think storage. There are three points to consider: whether your pet’s behavior favors covered or uncovered storage, whether you need indoor and outdoor storage and, finally, placement.
When deciding whether you need covered or uncovered toy storage, consider your pet’s behavior. Do you trust them to access toys and play at their own discretion? Would you prefer to keep an eye on them while they play? Or do you have a mix of both?
 I always make sure Pablo has a few toys floating around the house, but I prefer to keep the majority out of his reach. If you’re the same, the Pet Toy Storage Ottoman is an excellent solution. This storage piece boasts not only great capacity, including two inner pockets, but it adds extra seating or a great nap spot for your fury friend. This functional piece is attractive too. The classic chevron pattern in neutral gray and white tones compliments any home décor, and the playful paw print decal is the perfect whimsical accent. A detachable divider allows you to separate toys as needed.
If you’re looking for something a little easier to tote around the house, the Pet Toy Basket is a great addition to your play time. This fabric lined tote has two side rope handles, making it a cinch to move from room to room. Fill it up with toys, treats, bones and more – this tote is ready for the job. A soft beige color accents any modern décor and the same fun paw print decal adds the perfect, subtle label.
If you believe you are in need of outdoor toy storage as well, consider keeping a second basket by the door or adding outdoor storage like the Small Storage Bucket. If you need bigger or covered storage outside, The Outdoor Storage Box and Seat is sure to get the job done. This small sized deck box is an extra seat on the patio, as well as weather-proof storage for outdoor play things.
In the same breath, consider your placement. If you’re keeping toys outside, keep them close to the door. Inside, consider the living room or a spare bedroom where your pet likes to spend most of their time. The Toy Basket can easily be placed atop a bookshelf, while the Storage Ottoman is just at home with the rest of your living room furniture.
Bonus pet storage tips
- Leash and accessories: Be ready to go for a walk by keeping collars, leashes, disposal bags and more in one place. Utilize storage like the Pet Storage Hooks by the back door to tackle this project.

- Nip: Keep cat nip fresh by storing it in an air tight container and placing it in the fridge or freezer.
- Grooming: Tidy up hair brushes, shampoo and more by keeping items in a storage caddy under the bathroom sink, in the linen closet or laundry room.

Follow these basic steps and spend time playing with your best friend, not cleaning up after them.
Find more cool pet storage supplies plus easy ways to clean up after fury friends on our Pinterest page.
Find these products and more at organizeit.com.