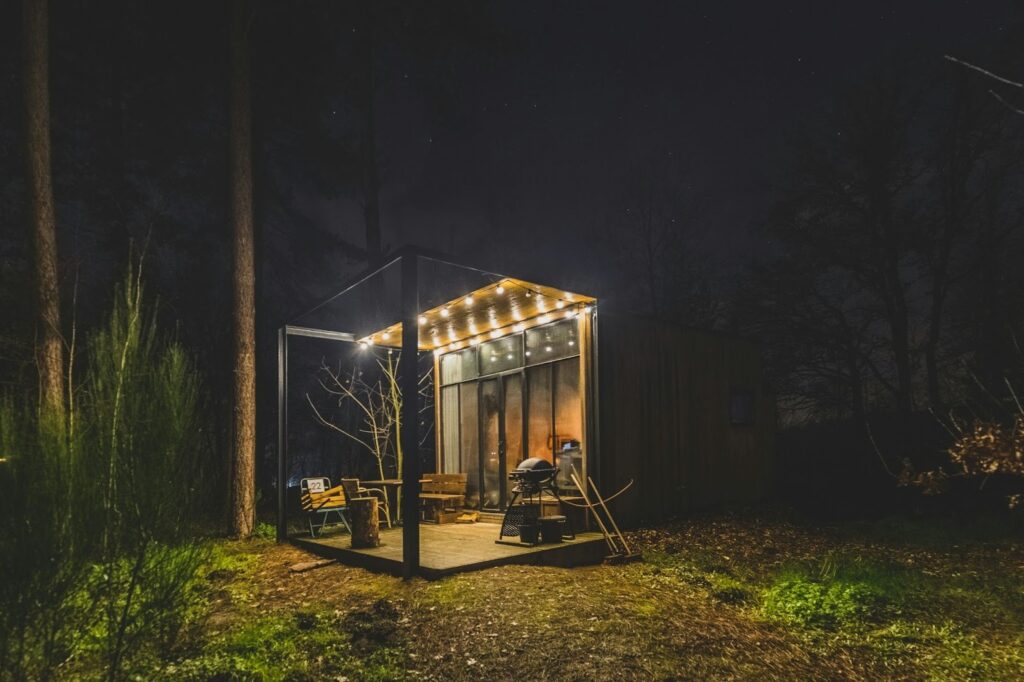
Facing the Challenge of Decluttering
March 2, 2026
When we first begin our lives we collect a lot of things, like a first sofa set for our first apartment, a toy collection, Grandma’s fine china set, saves every single one of their kids’ drawings, etc. It seems like we are building our life piece by piece. But all things come to an end. One day all these things feel like a burden, like their weight is a liability. In older years, thinking of going through all the things they have collected for the last thirty or forty years of their life is terrifying. Of course it isn’t just about the boxes or the mess on the counter, it’s about the memories. Everything reminds them of something, and letting things go feels like letting the memory go. This is why the act of cleaning is so much about more.
If you or your parents are feeling overwhelmed by decades of accumulated belongings, finding the right organizing help for seniors can actually be a huge relief, not just a chore. It’s about making a home safe and comfortable again, rather than a storage unit for the past.
Why “Just Throw It Away” Doesn’t Work
Seeing a parent’s home getting cluttered can be hard for some adult children. Perhaps one walked in and saw 50 margarine tubs and remembered the 1998 newspaper stacks. It can be frustrating because it is clear that the items have little to no value, but for parents, the items have value. Maybe the items represent some history, a story, and a past. As we get older, we start to get attached to things, and physical and even mental limitations can lead to things like depression and isolation, and depression makes it difficult to remain organized. After losing a loved one, it can be hard to throw things away, especially if the belongings start to fill a void. It isn’t even a simple decision to throw things away, and the mental burden of even simple decisions becomes magnified. It isn’t possible to push people to declutter. People need to be organized where they are currently, and working with them to figure out the limitations is a good start.
Where Do We Even Start?
Starting on any part that doesn’t have emotional attachments like a cabinet in the bathroom or a junk drawer in the kitchen is the way to go. Try to keep a steady flow, and avoid the emotional breakdowns. Using a “maybe” box for the things that you are currently unsure about can easily be set aside to be gotten rid of at a later date after the emotional attachment is gone. Most seniors have a lower emotional and physical tolerance, so work better when they have 45 minutes of work followed by 15 minutes of work. If you think of donations as gifts to people to help them, the process of decluttering will feel more positive.
Dealing with the Emotional heavyweights
Now, it’s time to face the tough truths about sentimental items. In this part, the real work is done. The truth is most items are kept out of guilt. Aunt Sally gave me this vase so it’s a family heirloom and I have to keep it. That is not the case. You have to appreciate the thought, but the vase is just glass.
A good method for sentimental items is to take a photo. If your dad has a collection of 300 hats, he probably doesn’t wear them. He keeps them because they remind him of the places he bought them. Boxed hats take too much space, so take a nice picture of the hats, make a nice photo book, and keep only 3. The memory is kept but the closet space is free. Saying something about inheritance can also be truthful. Parents often keep furniture or china thinking kids want it. “Mom, I love that china set but it won’t fit in my apartment. I’d rather you sell it and use the money for something fun,” is over the top conversational and goes against the point, so do the opposite.
When Family Is Not the Answer
Your parents might love you too much to leave the house as is, but to constructively help them declutter. Does this sound weird? It is true but the relationship between parents and children is sensitive and full of pressure points. A daughter asking a mother to get rid of a certain dress is a criticism of the mother’s taste or the mother’s history.
This is where the value of a 3rd party really works.
Organizers that focus on seniors as a niche are more than cleaners. They are part project managers, part therapists and part heavy lifters. They have none of the emotional baggage that family members have. When a son says it, that sounds like nagging.
Here is what some senior move managers or organizers handle:
- Sorting and Downsizing: They do the physical work of sorting items into categories.
- Paperwork Management: Helping sort through decades of files to find the important documents like deeds and wills.
- Floor Planning: If a senior is moving to a smaller assisted living facility, the organizer can map out exactly what furniture will fit so you don’t move too much.
- Disposal and Donation: They know exactly where to take old electronics, where to donate clothes, and how to schedule a dumpster if needed.
Safety First: The Practical Goal
While we worry about the emotional side, the physical danger of clutter is real. Falls are a leading cause of injury for seniors, and a cluttered house is a minefield.
When you are organizing, look at the house through a safety lens:
- Clear the Walkways: You should be able to walk through any room without turning sideways.
- Remove Scatter Rugs: These are trip hazards. Get rid of them or tape them down securely.
- Everyday Items Within Reach: The things used daily—coffee mugs, medication, reading glasses—should be at waist height. No climbing on step stools and no bending down to the floor.
- Light It Up: Clutter blocks light. Clearing surfaces often makes a room brighter, which helps with visibility.
Small Wins Matter
Don’t feel pressured to try and fix a lifetime’s worth of issues in a single day. That’s completely unrealistic. And because of that, every win should be celebrated. Regardless of how significant the win is, in your eyes, a tax return win is just as important as a tax return win, and a table win is just as good as a tax return win. Patience is an important part of the entire process. If it is important to you to create a home that is less cluttered, less stressful, and easier to clean, that is a very achievable goal, just about everything you want is very attainable, and you may want to consider bringing in someone to help you out.
Facade paints: which ones really last 5 years, and which ones will peel off after a year
February 19, 2026
On average, homeowners assume exterior paint will last five years, according to the report, but as soon as one brutal season has passed, it sometimes seems closer to peeling. Repainting a 2,000 sq. ft. home in the United States can cost $3,000–$8,000, based on region and surface type.
The difference between long-lasting and early degradation can be resin chemistry, surface preparation, climate stress, or warranty fine print. Some last seven to 10 years, and some fade in less than a year. Homeowners using an LBC Mortgage broker for renovations should understand these factors to protect their investment and avoid costly repainting.
Check Resin Type Before Purchase
However, in the U.S. 100% acrylic latex paints tip the scale on their higher performance side. They are flexible when siding expands in the summer heat or contracts during winter freezes. Similarly, wall surfaces can range from below 20°F to above 140°F with direct sun—particularly in south-facing elevations. Under these conditions, inexpensive vinyl-acrylic blends lose their elasticity more rapidly. When the film gets brittle, it cracks, and then rain comes in.
However, premium 100% acrylic paint will last 5–10 years on wood and most types of siding. Cheaper blends frequently start to chalk or flake after 1–3 years, particularly in states with a lot of UV like Arizona or Texas. That label can be deceiving, since “acrylic latex” doesn’t always mean 100 percent acrylic resin. If the can does not specify “100% acrylic,” then it is a vinyl product. That shortcut usually reduces lifespan. When evaluating exterior paint, pay attention to:
- Resin type: Look specifically for “100% acrylic” on the label.
- Flexibility rating: Essential for regions with large temperature swings.
- Solids by volume (38–45%): Higher solids create a thicker, more protective film.
- UV resistance: Critical in high-sun states.
- Surface compatibility: Ensure suitability for wood, stucco, or fiber cement.
Solids by volume also matter. Solids are 38-45% so that the film is thicker with more protection. Lower numbers indicate less coverage and a shorter life. If you are a fan of long-term durability, resin quality isn’t an option—rather, it means that in year two versus year eight, you have to paint again.
Test Surface Prep Quality
The majority of paint failures begin with a failure at the substrate and move to the surface. Industries. Data from the Painting Contractors Association indicates that over 70% of all failures in customer paint projects is due to improper preparation. Dirt, chalk dust, and mildew inhibit bonding. Here, paint adheres to the contamination, not to the wall.
Moisture is the silent killer. 15% ish is a cut-off line when it comes to painting wood siding. Blistering and peeling may start in a year above that level. The inexpensive moisture meter will cost $30–$50; meanwhile, a several thousand dollar repaint is not even worth comparing.
Primer is another common shortcut. Bare wood calls for a bonding primer, and masonry, though not concrete, requires an alkali-resistant primer. Skipping primer to save a couple of hundred dollars typically shortens the life of the service by half. Even $80-a-gallon premium paint will flake off if applied to a poorly prepared wall. By contrast, a mid-range product will “last five good years if your prep work is done properly,” he said.
Calculate Climate Exposure Risk
Climate dictates how hard the paint film has to labor each day. Florida’s humidity routinely tops 70% for extended periods of time, which does nothing but promote mildew growth and blistering. And at Colorado’s higher elevations, UV intensity is also higher, and pigment-breakdown and fading occur sooner. What is the perfect color for a photo in Ohio that might fade after two years in Denver.
Orientation matters too. In the summer, walls facing south or west can reach more than 150°F in the direct sun. It absorbs more heat and can run 20-30°F hotter than light colors. And that additional heat puts strain on the binder and reduces its life span. Salt exposure from being near a coast also accelerates decay around joints and fasteners.
There is no one-size-fits-all formula that wins everywhere. UV-prone climates require UV-resistant binders and stable pigments. Wet regions require mildew-resistant additives. Paint chemistry matched to local stress conditions can often add several years’ longevity. “Disregarding the climate is a quick way of finding yourself back seeing your ship earlier than you wanted to,” he said.
Audit Brand Warranty Claims
When you’re in the market for exterior paint, holding out for “lifetime” coverage pays off. That sounds reassuring, but it hardly ever says what homeowners think. Most manufacturer warranties are for manufacturing defects, not regular wear and tear or substandard application. If paint fails because of poor surface preparation or moisture, “coverage” usually goes with it.
Labor is seldom included. Even if some gallons of product are replaced, you’re still on the hook for scraping, priming and repainting. Instead, on a project that labor is somewhere in the neighborhood of 70% -80% of overall cost it means very little to the actual expense on free paint.
Higher-quality exterior paints run from $60–$90 a gallon, and economy types range between $25 and $40. On a full repaint, that difference in price might amount to a few hundred dollars on the entire job. If the cheaper paint results in a repaint three years sooner, those savings will go down the drain. The warranty slogan is marketing. The real grit comes from chemistry, preparation, and clearheaded expectations about the weather.
Corralling The Chaos: Creating An Organized Game Room That’s Perfect For Playing In
January 22, 2026
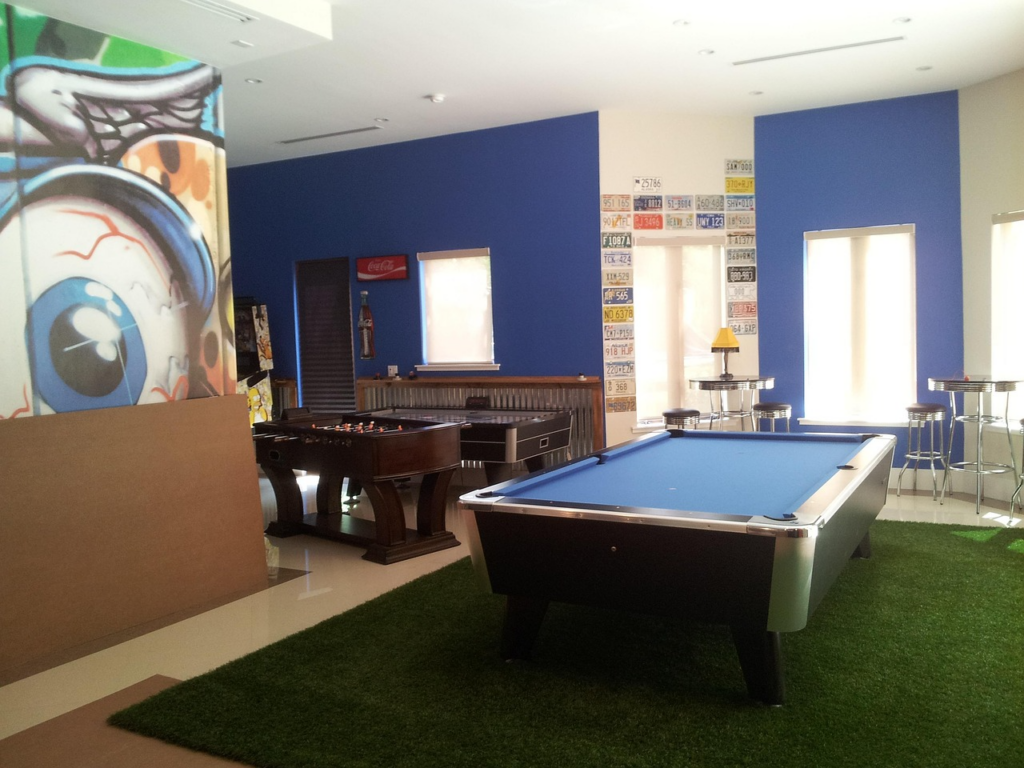
Organized games room – Pixabay
A games room has to be one of the most exciting things you can create in your home, and more and more folks are looking at adding them… but there’s a significant bugbear that will soon come to plague your new space if you aren’t careful. Chaos. Clutter. Confusion.
Games of all kinds come with stuff that needs to be stored. Wires, controllers, charging stations, dice, games boxes, rulebooks, boards, tables, counters, chips – the list is nearly endless, especially if you’re someone who enjoys quite varied gaming and has various mediums. To stop the chaos from spilling over and sweeping away your enjoyment of being in your gaming space, or possibly even affecting your health, we’ve put together the most effective approaches for keeping your gaming space tidy.
Designate Zones
First things first: let’s organize the room, not the stuff in it. Start by creating different zones for the different activities; this will automatically inject a bit of order and will make your follow-up organization techniques work better.
So, how does this work? It depends a bit on what you have in your room, so let’s look at a few examples. Let’s say you’re a keen board game player. You need a table for your games with a large enough surface, and you need good seating. This can form one area.
Next, perhaps you’re a fan of digital games too. If you opt mostly for those that can be played on portable systems like mobile devices or laptops, you should set up a cozy corner with good lighting, a place for a drink, and an available power outlet (no dying devices during a play session on your watch!). Let’s say you love playing video poker for real money. With our setup, you’ll have a comfortable and supportive place to sit, constant access to power, and a secondary light so you won’t strain your eyes while looking at the screen.
One of the great things about video poker is that you can settle in for a quick session, or play for longer, depending on your preferences. Making sure the room is conducive to that – with good seating being the number-one priority – will ensure these sessions feel calm, organized, and seamless. No having to move when you’re trying to read a paytable because your phone is flashing a low battery warning. No squinting at the screen or feeling drained and stiff afterward. Organization might not seem necessary for flexible games like video poker, but trust us: putting in the effort first makes all the difference to how these sessions feel, and how much relaxation you can gain from settling in.
That’s true for lots of mobile and laptop games, of course. And if you’re playing a longer form game like poker, you definitely need this organized setup where you’ll be comfortable and have eliminated interruptions in advance. Even if you’re not planning on playing and you’re just going to absorb some related content, you need a good spot to curl up in so you can enjoy things like the top poker secrets with ease.
https://www.youtube.com/watch?v=P9NXrWn1UHw
If you’re also a console player, the great news is that you can make a single “digital” zone for everything. The same comfortable chair and outlets will let you set up and enjoy a console and TV, without detracting from your mobile enjoyment.
List The Staples
Once you’ve got your zones, it’s time to figure out how to start organizing the stuff that will go into them. Start by making a list of the components that are non-negotiable, such as power cables, controller docks, TVs, etc. In the area for physical games, this is likely to include things like the games you want to play, any extras (e.g. dice towers, counters, character boards).
Next, look at what kind of storage will work well for those non-negotiables. A TV table, for example, with drawers or shelves for DVD/game storage, is likely to be needed in your electronics area. In the board game area, consider the size and shape of your games to figure out what kind of storage will work well for them. A bookcase can be effective for smaller boxes, while you might need a chest or larger storage if you’ve got lots of large games.
If possible, opt for multi-functional furniture. A coffee table that stores games on a shelf underneath or a TV cabinet with lots of other storage options will really help.
Next, think about space for food and drinks. We all love to snack while we’re gaming, but you don’t want greasy fingers on your cards or screens, and you really don’t want spilled drinks near the boards or electronics! Separate side tables that can be nested away when not in use are often the best solution here.
You can also use storage baskets to corral things like board game pieces, extra cables, charging docks, etc. The less “loose” stuff in your games room, the tidier, fresher, and more organized it will feel.
Do A Post-Organize Check
A couple of weeks after you’ve completed your organization process, do a check of the room and look at anything that’s out of place. Why has it been left out? Do you just need to tidy up, or is it something that doesn’t really have a “home”? If the latter, make a spot for it to live in. It’s much easier to keep a room clear when everything has a designated place to live – so don’t neglect this step!
If any parts seem to be really resistant to your organization efforts, look up specific tips for tidying that precise thing; you’ll find tons of useful guides online. Video games defeat many of us, but even they can be mastered if you find an approach that works for you!