Minimalism Without Sacrifice: Why Storage Units Are the Missing Piece
April 18, 2026
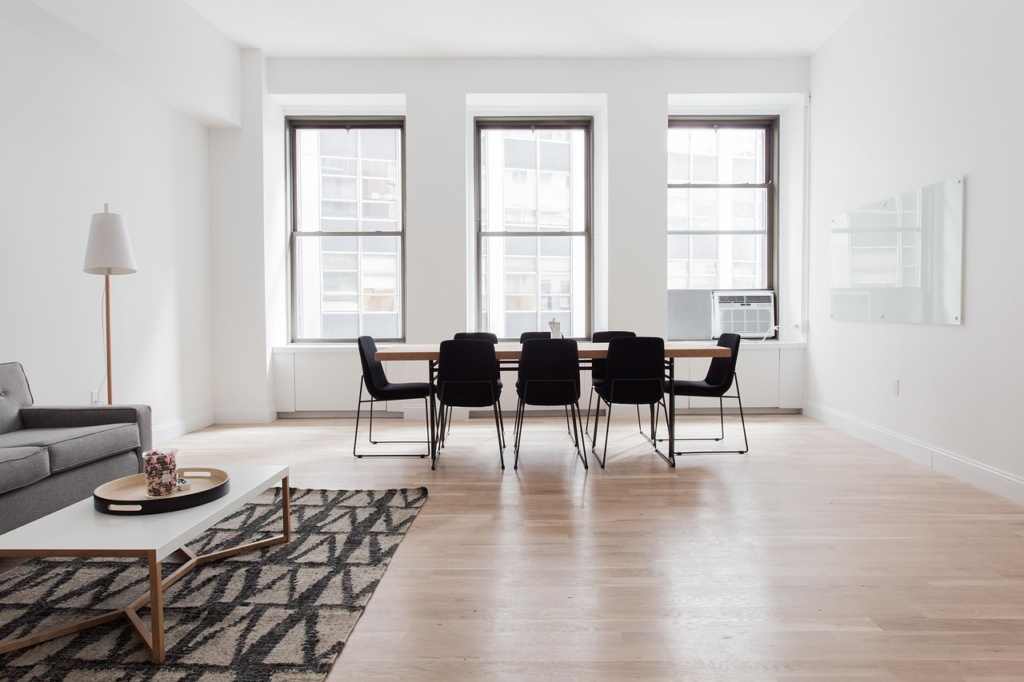
Minimalism is usually presented as a way of thinking, yet in reality it is a logistical problem. Homes are supposed to house all at once, seasonal goods, sentimental goods, occasional-use equipment, even when there is not much space. The result is predictable. Even with disciplined decluttering, excess accumulates because the issue is not always quantity. It is timing and frequency of use.
A winter coat in July is not clutter because it lacks value. It is clutter because it takes up space but is not in use. The same applies to travel equipment, papers, tools, and inherited items. Minimalism struggles when it ignores this basic mismatch between space and time.
Storage Units as Controlled Overflow
Storage units solve this mismatch by acting as controlled overflow rather than permanent dumping grounds. The distinction matters. When used intentionally, they extend a home’s capacity without compromising its functionality.
Instead of forcing every item to justify its presence daily, storage allows items to exist in the right context. Items that are useful but not immediately relevant are relocated, not discarded. The home becomes a space optimized for current living rather than long-term storage.
Decluttering in a More Rational Way
Conventional decluttering guidance usually favors binary choices: retain or discard. In reality, many belongings fall into a third category: retain. However, this is where decluttering becomes more precise and less emotional.
Instead of rushing into premature decisions, people can sort out items according to usage patterns. Essentials are sorted on a daily, weekly, and monthly basis. All other things can be reviewed later without consuming precious living space. This minimizes decision fatigue and avoids reaccumulation through regret.
Designing Space Instead of Filling It
A clean house does not merely have less stuff. It is a space that has been designed purposefully. Clear paths and open surfaces enhance usability. Accessible storage systems, on the other hand, minimize cognitive load. However, all these advantages are lost when each cabinet and drawer is full.
External storage supports better design by removing the need to maximize every inch internally. It enables homeowners to preserve margins- empty space that enhances both functionality and beauty. This approach is useful even to more specialized solutions such as modular garage storage units that are only effective when they are not overloaded.
Flexibility Without Compromise
Life is dynamic and storage strategies ought to mirror that. Families expand, leisure activities transform, and work patterns alter. A strict minimalist system may not cope with changes, resulting in frequent purging and repurchasing. Storage units introduce flexibility without forcing constant downsizing.
Equipment that is used a few times a year does not have to compete with everyday necessities for space. Documents that must be retained for legal reasons need not take the centre-stage at home offices. Even sentimental items can be preserved without disrupting daily environments. Options like Winchester storage units provide a practical buffer that supports these shifts without adding friction.
Endnote
Minimalism is most effective when viewed as an optimization problem and not as a philosophical ideal. The goal is not to have as little as possible, but to be sure that what is present serves a purpose in the moment. Storage units enable this by separating ownership from immediate access. When space is aligned with usage, homes become more efficient and less stressful to manage. The result is not deprivation, but clarity.
5 Home Organization Mistakes and How to Fix Them
April 18, 2026
Photo by Nechirwan Kavian on Unsplash
Time and time again, studies have shown that decluttering offers a wide range of benefits. The simple act of organizing your possessions can boost your mood, sharpen your focus, improve your productivity, and relieve anxiety.
With that in mind, it’s only natural to load up your shopping cart with containers and organizers, intending to clear the chaos from your home. However, before you get started, take note of these common organization mistakes. Being aware of them may streamline your journey to clutter-free living.
Mistake #1: Not Being in the Right Headspace
Being in the right headspace for decluttering and organizing your home is important because it’s an emotional and cognitive process, not just a physical one. Decluttering and reorganizing require mental energy to make difficult decisions and break sentimental attachments. If you aren’t focused and mentally strong for the task, you risk making poor decisions, failing to achieve your goals, and feeling overwhelmed.
The fix: Take your time. In most cases, there is no rush to declutter and reorganize your home. If it helps, rent self storage Anderson to store possessions that are cluttering your home, so you can make downsizing decisions when the time is right.
Mistake #2: Buying Storage Solutions Without a Plan
As tempting as it can be to load up on baskets, boxes, and other fun storage solutions at your local retail store, it can ultimately be a waste of money. You likely don’t yet know what you’ll put in them or whether they’ll fit best in the space where they’ll add the most value to your home.
The fix: Plan before you buy. Identify the ‘problem areas’ in your home and research the best solutions for each space. For example, you might purchase a shoe bench to deal with the shoe clutter in your mudroom, or a hanging organizer for a chaotic closet.
Mistake #3: Not Clearing Clutter Before Reorganizing
When your home appears cramped and crowded, it’s easy to assume that a lack of storage space is your main issue. As a result, you buy additional storage items and fill them up with all your worldly possessions. While minimal storage space undoubtedly contributes to the issue, too much stuff can be the most obvious cause.
The fix: Before you attempt to reorganize your home, clear the clutter first. Go through possessions room by room and sort them into four piles: Keep, trash, donate, and sell. With fewer possessions, reorganizing can be much easier and faster!
Mistake #4: Not Asking for Help
Organizing a home can be overwhelming. You don’t know where to start, let alone how. As a result, you continue to exist in a home that makes you feel stressed, anxious, and crowded. This is a significant mistake, as it prevents you from living the comfortable life you deserve.
The fix: Ask a trusted friend or family member for help. You may find that those closest to you are only too willing to help you transform your home into an organized, comfortable, and welcoming haven.
Mistake #5: Prioritizing Aesthetics Over Function
There is nothing wrong with choosing aesthetically pleasing storage solutions. If they bring you joy and help you present your home beautifully, it’s a win-win! However, you should never prioritize aesthetics over function. Doing so may mean that everyday tasks that involve the items you’re storing are more awkward and time-consuming.
The fix: Identify a problem area in your house and research storage solutions that will resolve it. When you’ve identified the type of storage product you need, you can focus your attention on choosing the one that meets your design and aesthetic requirements.
When you’re ready to organize your home and clear the clutter, awareness of these common organizational mistakes, such as not asking for help and not creating a plan, may mean you enjoy a straightforward and stress-free decluttering process.
7 Helpful Tips for Storing Seasonal Items Efficiently
April 18, 2026
Photo courtesy of Unsplash
One challenge of owning a home is keeping it organized year-round, especially when seasonal items start piling up. Items like winter coats, summer gear, outdoor furniture, and holiday decorations can take up valuable space when not in use.
Without a proper storage plan, your house can quickly become cluttered, making it difficult to find items when you need them. Luckily, a few smart strategies can help you store these belongings safely. Read on to discover seven tips you may find helpful.
Clean and Inspect Each Item Beforehand
When you clean and inspect items before storing them, you can prevent dirt, oil, and pests from permanently damaging them over time. Whether you’re storing your favorite wine glasses, this strategy also helps you avoid wasting space on broken or unneeded stuff. Since cleaning removes stains immediately, it helps ensure everything stays in sharp condition and protects your investments in the long term.
Use the Proper Storage Containers
Good storage containers serve as a physical defense against dust, moisture, and pests, which can damage fragile fabrics and electronics. When you use uniform, stackable bins, you can maximize space and keep your storage area organized. If you live in the city, consider paying for storage Oakdale to ensure your items remain protected and accessible.
Separate Items By Season
Arrange items by season to make transitions easier and ensure only relevant items are most easily accessible. With this organization, you’ll prevent clutter and reduce the time you spend looking through irrelevant belongings. Grouping similar items together creates a simple system that makes it easier to retrieve and replace them anytime you need to.
Label Each Item Properly
With proper labeling, you’ll eliminate guesswork and identify contents without necessarily opening each container. This method helps you save time, especially during busy seasonal transitions, and prevents the frustration of misplacing items. Clear labels also help others find and return items appropriately, improving efficiency. They also keep your storage system sustainable.
Protect Fragile Items
By protecting fragile items, you prevent irreversible damage from pressure, shifts, or heat during long-term storage. For instance, bubble wrap or sturdy padding keeps delicate ornaments or glassware safe when stacked. This extra bit of care maintains the integrity of your items and keeps each piece ready for use at any time.
Create an Inventory List
An inventory list serves as a roadmap, helping you know what you own and preventing you from buying duplicates. When creating a list, include their exact locations and conditions to make retrieval easier. This is one simple way to improve efficiency, reduce stress, and keep your storage system organized and more manageable.
Do Not Overpack Storage Units
Overpacked storage units may lack proper airflow, causing potential moisture buildup and mildew growth that can damage expensive items like fabrics. It can also make it difficult and dangerous to access items when you need them, as stacks may be unstable. When you stick to moderate spacing, especially in seasonal storage solutions, you protect your belongings and peace of mind.
Endnote
It can be tough to store and retrieve seasonal items if you do not pay attention. To make the process more efficient, clean and check each item, use the proper storage containers, and separate them by seasons. Also, label them, protect fragile ones, avoid overpacking, and create an inventory list.